Table of Contents
How to Repot Your Bonsai Tree
Repotting Bonsai is crucial to keep your tree from becoming pot-bound and starving. When a Bonsai tree uses up all the nutrients in its soil and its roots conform to the pot’s shape, it becomes pot-bound. Without space and nutrients, growth halts, and the tree risks dying.
How Often Should I Repot a Bonsai?
Repotting Bonsai is essential, but how often should it be done? It depends on the pot size and tree species.
Fast-growing trees:
- Repot every two years.
- Sometimes even sooner.
Older, mature trees:
- Repot every three to five years.
Repotting isn’t routine. In early spring, carefully remove your Bonsai from its pot.
- Roots circling around the root system: Time to repot.
- Roots still contained in soil: Leave it, check next spring.
Indoor Bonsai:
- Often planted in organic soil that holds too much water.
- Can lead to root rot and other issues.
- If you buy a tree like this, repot it with proper Bonsai substrate in early spring or fall.
When to Repot?
Timing is Everything
The best time for repotting Bonsai is early spring. Trees are dormant, and buds are just starting to swell. With no full-grown foliage, the damage from repotting is minimized.
Repotting in early spring ensures the root system repairs quickly once the tree starts growing. Some trees can be repotted in the fall, but never repot a Bonsai in summer or winter.
Quick Tips for Repotting Bonsai:
- Early Spring: Ideal time, with dormant trees and swelling buds.
- Avoid Summer/Winter: Trees are stressed, and repotting can cause harm.
- Root System Repair: Spring repotting helps roots recover fast.
Choosing the right soil mixture For Repotting Bonsai
Why Soil Matters
The soil needs to drain well to keep roots from rotting but also hold enough water to hydrate the tree.
Here’s a go-to mix for most Bonsai trees:
- 1 part Akadama (absorbs water)
- 1 part pumice (drains well)
- 1 part lava rock (adds structure)
Tips to Adjust the Mix:
- Busy schedule? Add more Akadama for better water retention.
- Live in a humid area? Add more lava rock for better drainage.
For more on Bonsai soil, check out the Bonsai soil article.
Choosing the Right Pot
Picking the perfect pot is key when repotting Bonsai. The pot’s size and style should match the Bonsai’s aesthetics and your desired look. Here’s what to consider:
- Size: Ensure the pot is proportionate to the Bonsai.
- Shape: Match the pot’s shape to the tree’s style.
- Colour: The pot’s colour should complement the Bonsai.
- Design: Consider the pot’s design elements.
The right pot can elevate the whole composition. Keep in mind factors like the Bonsai soil mixture, Bonsai pot selection, and timing for Bonsai repotting. Use tools like root rakes, chopsticks, wire cutters, and scissors to assist in the process. Elements like Akadama, pumice, and lava rock are crucial for soil composition, and mesh for drainage is a must.
Repotting Bonsai Step By Step
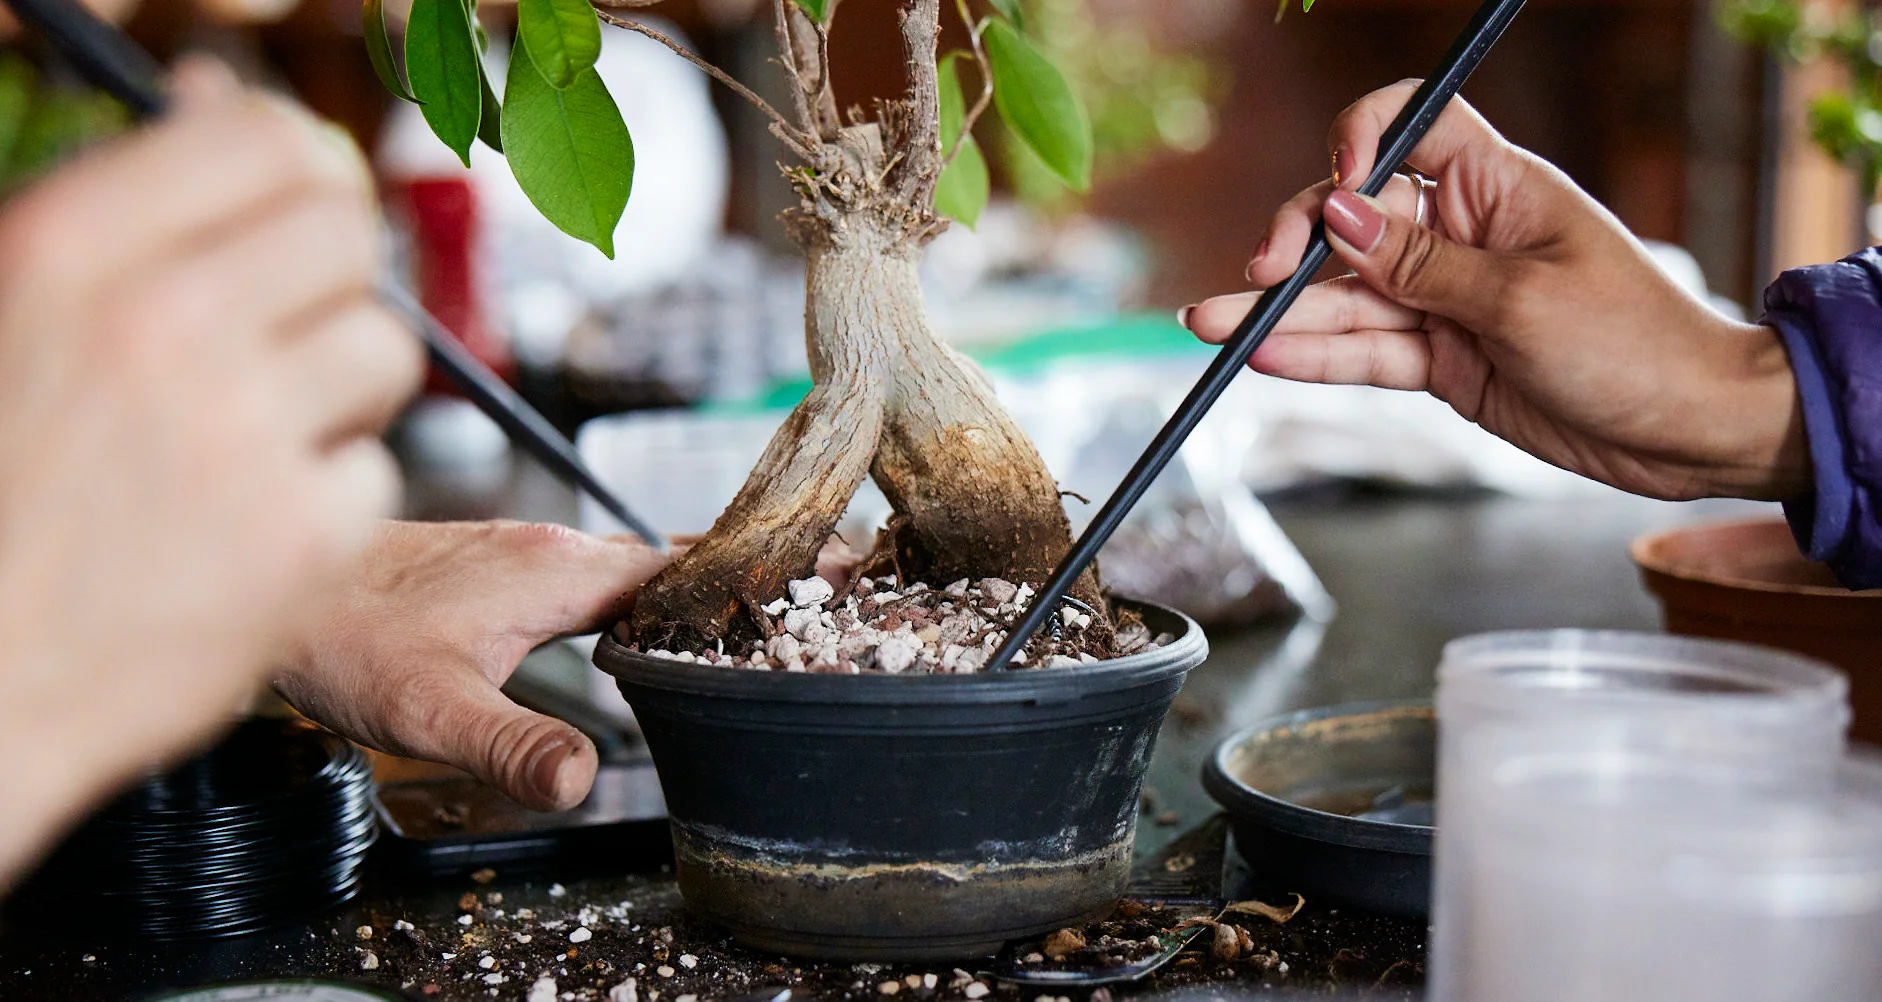
- Make sure you have the right tools handy: root rake, scissors, wire cutter, and a chopstick.
- Bonsai often come anchored to their pots. If that’s the case, cut the wire to free them up.
- Use a root rake to gently remove your bonsai from its pot.
- Check if your bonsai needs repotting. Look for roots circling around the inside of the pot. If they are, it’s time to repot.
- Using a chopstick, gently remove the old soil from the sides and bottom of the tree. Be careful not to damage the roots.
- For pine bonsai, keep at least half the root mass intact to protect the mycorrhizal fungus, essential for the tree’s health.
- With scissors, trim any roots that have grown too long. Limit pruning to no more than 30% of the total roots. This helps balance the tree’s growth.
- Start with an additional wire. This wire will be used to stabilize and anchor the tree to the pot later.
- Heavy Grain Soil: Add a thin layer of heavy grain soil first. Think lava rock, grit, or akadama. This layer is crucial as it serves as a drainage layer, preventing waterlogging.
- Bonsai Soil Mixture: Next, add another thin layer of Bonsai soil. This layer ensures that the tree has the right nutrients and support.
- Secure the Tree: Use the wires from step 9 to secure the tree firmly in its pot.
- Add Bonsai Soil: Fill around the tree with Bonsai soil, ensuring it reaches all roots.
- Eliminate Air Pockets: Use a chopstick to gently pack the soil, removing any air pockets.
- Thoroughly Water: Water the tree generously to settle the soil.
- Post-Repotting Check: Two weeks later, observe the tree’s progress post-repotting.
Timing Matters
When it comes to repotting your bonsai tree, timing is crucial. Aim to repot in early spring, just before the growing season kicks off.
Click here to download this guide as PDF


2 responses to “How To Repotting Bonsai with perfection”
[…] To read more about Repotting Bonsai click here […]
[…] bonsai trees don’t need frequent repotting, especially the juniper varieties. Young trees can be repotted every couple of years, while older […]